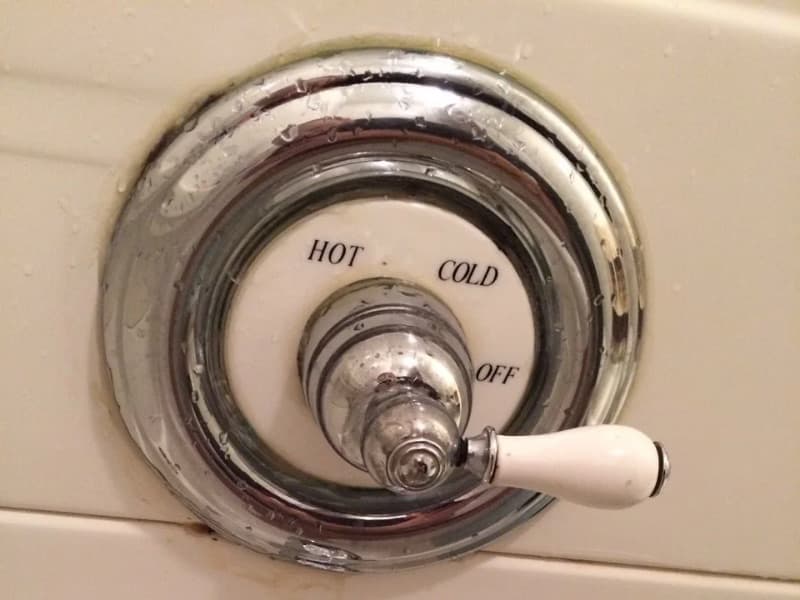
The shower faucet handle is held together by screws which must be removed to repair it. Unfortunately, when these screws get stuck, you can’t get a good hold on them, and unscrewing them becomes an arduous task, even for an experienced handyman.
Remove a stuck shower handle screw using either rubber bands, a hammer, pair of pliers, or a drill bit. With the drill bit, drill it into the center of the handle to push in the screw extractor until it reaches the screw. Once in position, turn it counterclockwise to extract the screw.
So, if you’re wondering how to repair a stuck screw from your shower valve, keep reading to learn about the many methods available in this DIY article. In all the procedures, be careful not to damage tiles since installing tile showers is costly.
What makes shower handle screws get stuck?
Shower handles can become difficult to turn for various reasons, the most common of which is the accumulation of debris. Internal rust or an old, failing gasket that has gotten in the way of the turning screw is more likely than accumulation.
Some of the reasons for stuck shower handle screws include the following:
- Water-borne mineral deposits, particularly calcium, can accumulate over time, clogging the screw mechanism designed to operate freely.
- Residue from shower products, significantly more aesthetic than cleansing, can accumulate over time.
- Minor leaks from both the exterior housing and the internal mechanism might cause forms of accumulation over time. It might lead to rust even in stainless steel faucets.
- Corrosion: The most common reason is poor cleaning, either too much using harsh chemicals or abrasives or too little cleaning.
Any one or a combination of these causes can easily lead to a stuck shower handle screw.
How to remove a stuck shower handle screw
You can remove stripped screws from your shower in a few different methods. Depending on the screw type, some ways may be more effective than others. Some of these procedures utilize standard DIY tools found in most households and are always worth attempting before drilling the stuck screw out.
Remove a stuck shower handle screw using the following methods:
Rubber bands
Rubber bands, believe it or not, can come in handy when it comes to extracting stuck screws! They give your drill or screwdriver more grip, allowing you to remove the stripped screw in your shower without breaking a sweat as follows:
- Place the rubber band over the stripped screw.
- Slowly unscrew it, ensuring your drill and rubber band are still in a suitable position for a firm grip.
- As you crank your drill, you should notice that the extra grip helps the screw turn, making removal simpler.
If your stripped screw has Phillip’s head, you can use a flat-head screwdriver and the rubber band method to push the stripped screw free.
- Place the rubber band over the stripped Phillip’s screw. You may tap your screwdriver into the screw head with a hammer for more grip, but be careful not to break the rubber band.
- Slowly turn the screw until you feel movement and the stripped screw releases.
These methods are pretty easy to carry out and need no special skills. The difficulty of each method depends on the water supply line height from the floor.
Hammer
Although using a hammer may appear to force the stripped screw further away, you may use the hammer in conjunction with a manual screwdriver to help break the screw for easy removal. This is how:
- Place your screwdriver on the screw head and tap it several times with your hammer to secure it.
- Once you’ve determined that your screwdriver is placed into the screw, hit it as many times as necessary to establish a firm grip on the screw.
- After a firm grip, you may spin the stripped screw to remove it from your shower faucet, and your screwdriver is firmly placed in it.
Be careful not to damage the screwdriver’s head when using the hammer.
Pliers
This procedure will work only if the stripped screw isn’t flat against your bathroom tiles. This approach may work to assist you in getting rid of your stripped shower faucet screw if you can see a bit of the screw sticking out, providing you with a firm grip.
This procedure will need some effort, but even if you can only obtain some movement from the screw using the pliers, it may be a decent first step before trying another way to remove the stripped screw.
Use the pliers as follows:
- Position your locking pliers to gain a good hold on the screw.
- To gain movement, twist and pull on the stripped screw once you have a firm grasp.
Keep performing these actions if you feel the screw is starting to give way.
Cobalt Drill Bit
This is generally the final choice for many, but it is often the most successful and saves you from working up a sweat to remove your faucet’s stripped screw. A drill with a cobalt drill bit installed is required.
The diameter should be big enough to fit into the screw head slot, regardless of whether it is an Allen or Phillips head. The steps are as follows:
- Drill enough through the head’s center until the bit goes through the screw’s head. Go slowly and carefully.
- Swap your cobalt bit for one that matches the screw head diameter once you reach the base of the screw head.
- By putting your drill in the hole you produced, drill out the head of your stripped screw with your new drill bit.
- Drill your screw head till the internal diameter is reached, then carefully remove your drill bit from the handle.
- It should now be possible to remove your tap handle with some wiggle. You may also use the pliers to twist the tap away from the stripped screw at this point.
In all this, make sure you don’t damage the screw or the area around it with your tools.
How to remove a shower handle without screws
Single and double faucet handles are the two main types of faucet handles. These two handles are significantly distinct, and their removal techniques are also pretty different. We’ll go through the single-handle faucet in this post.
To understand how to remove a single shower handle without screws, carefully follow the steps below:
STEP 1: Find the cap or button
A button or a cover will replace the screws on the shower handle. You must first find the button or cap before removing the faucet handle. It’s commonly mounted on the side or top of the faucet.
STEP 2: Using a flat screwdriver, remove the cap or button
When you find the cap or button, place your screwdriver into the little gap and carefully work it around its edge until the button or cap is removed. You should be aware that some of these faucet handles are delicate and should be handled cautiously.
STEP 3: Turn off the water faucet
Switch off the water supply before changing the cartridge within the faucet.
STEP 4: Remove the screw
After you’ve switched off your water supply, remove the screws. To select the correct wrench for loosening the screw, you must first ascertain the screw’s size.
Before removing the screw, stop the drain or cover it with a cloth to prevent it from falling inside.
STEP 5: Remove the handle
After removing the screws, pull out the shower handle. You might try using your hands to pull the handle. Use a faucet handle puller or pliers if you can’t get it out with your own hands.
We advise against using the pliers directly on the faucet handle since they may scratch it. Wrap a cloth over the base of the faucet handle before attempting to use the pliers.
After removing the faucet handle, clean the area. Mineral deposits can be removed using lemon or distilled white vinegar.
After that, rebuild the pieces you removed after cleaning them and replacing any broken parts. Ensure you keep the dismantled components safe to avoid losing them.
Conclusion
Instead of seeking expert assistance, you can complete this task at home by following these steps. Hopefully, this article has provided enough information on removing a stuck shower handle to complete your task effectively.